Saturday, February 18, 2012
Vegetable & Chorizo Stew
A lovely local restaurant holds a weekly prix fixe wine tasting dinner, themed by region. I went with a friend a few months ago and it was delicious and charming. But, of all of the wonderful things we tasted that evening, one dish lingered with me: an early autumn vegetable stew with chorizo. It featured a broth that was simultaneously light and full of bold, smokey flavor. It was hearty in taste but not heavy in the stomach. And, with nothing to go by other than my vague recollections, I set out to attempt a recreation.
My version is certainly not identical to the original, but was very tasty and pleasing nonetheless. I don't remember if the original had beans-- I don't think it did-- but I decided to add some to make it just a little heartier for the middle of winter, mild as this one may be. For an earlier fall dish I think I'd replace the beans with some more corn and perhaps some diced carrots, sauteed in a pan a bit before being added to the broth.
Ingredients:
- 2 raw chorizo sausages (though I think it could also be quite lovely with dried chorizo, as I believe was featured in the original)
- 1 onion, diced
- 1 stalk celery with leaves, diced
- 1/4 c. dry red wine
- 3 c. water
- 1 tsp salt (or less if sausage is particularly salty)
- dash paprika, dash cumin, 1/2 tsp black pepper
- lacinto kale, destemmed and chopped
- 1 can cannelini beans, rinsed well (home-cooked would be ideal, but I tend to fall short here)
- 1/2 c. corn (fresh or frozen)
Directions
- Slice the chorizo into 1/2" slices
- Heat a dry dutch oven or heavy bottomed pot over medium
- Sear the chorizo on each side in two batches. Remove and set aside.
- Add the onions to the hot pot and saute for about 3 minutes.
- Add the celery and saute another minute.
- Deglaze the pot with the wine, then add the water, the sausage, and the salt.
- Cover and simmer at 30-45 minutes.
- Add the beans, kale, and corn, adjust seasoning and simmer another 20 minutes.
This makes about 4 servings, especially is served with hearty bread to soak up all of the delicious broth.
Enjoy!
Labels:
Beans,
Cold Weather,
Pork,
Soup,
Vegetables
Wednesday, February 15, 2012
Are limes the fashion now?
I'm dreadfully in debt, and it won't be my turn to have the rag money for a month."
"In debt, Amy? What do you mean?" And Meg looked sober.
"Why, I owe at least a dozen pickled limes, and I can't pay them, you know, till I have money, for Marmee forbade my having anything charged at the shop."
"Tell me all about it. Are limes the fashion now? It used to be pricking bits of rubber to make balls." And Meg tried to keep her countenance, Amy looked so grave and important.
"Why, you see, the girls are always buying them, and unless you want to be thought mean, you must do it too. It's nothing but limes now, for everyone is sucking them in their desks in schooltime, and trading them off for pencils, bead rings, paper dolls, or something else, at recess. If one girl likes another, she gives her a lime. If she's mad with her, she eats one before her face, and doesn't offer even a suck. They treat by turns, and I've had ever so many but haven't returned them, and I ought for they are debts of honor, you know."
"How much will pay them off and restore your credit?" asked Meg, taking out her purse."
"A quarter would more than do it, and leave a few cents over for a treat for you. Don't you like limes?"
"Not much. You may have my share. Here's the money. Make it last as long as you can, for it isn't very plenty, you know."
"Oh, thank you! It must be so nice to have pocket money! I'll have a grand feast, for I haven't tasted a lime this week. I felt delicate about taking any, as I couldn't return them, and I'm actually suffering for one."
Little Women
Little Women
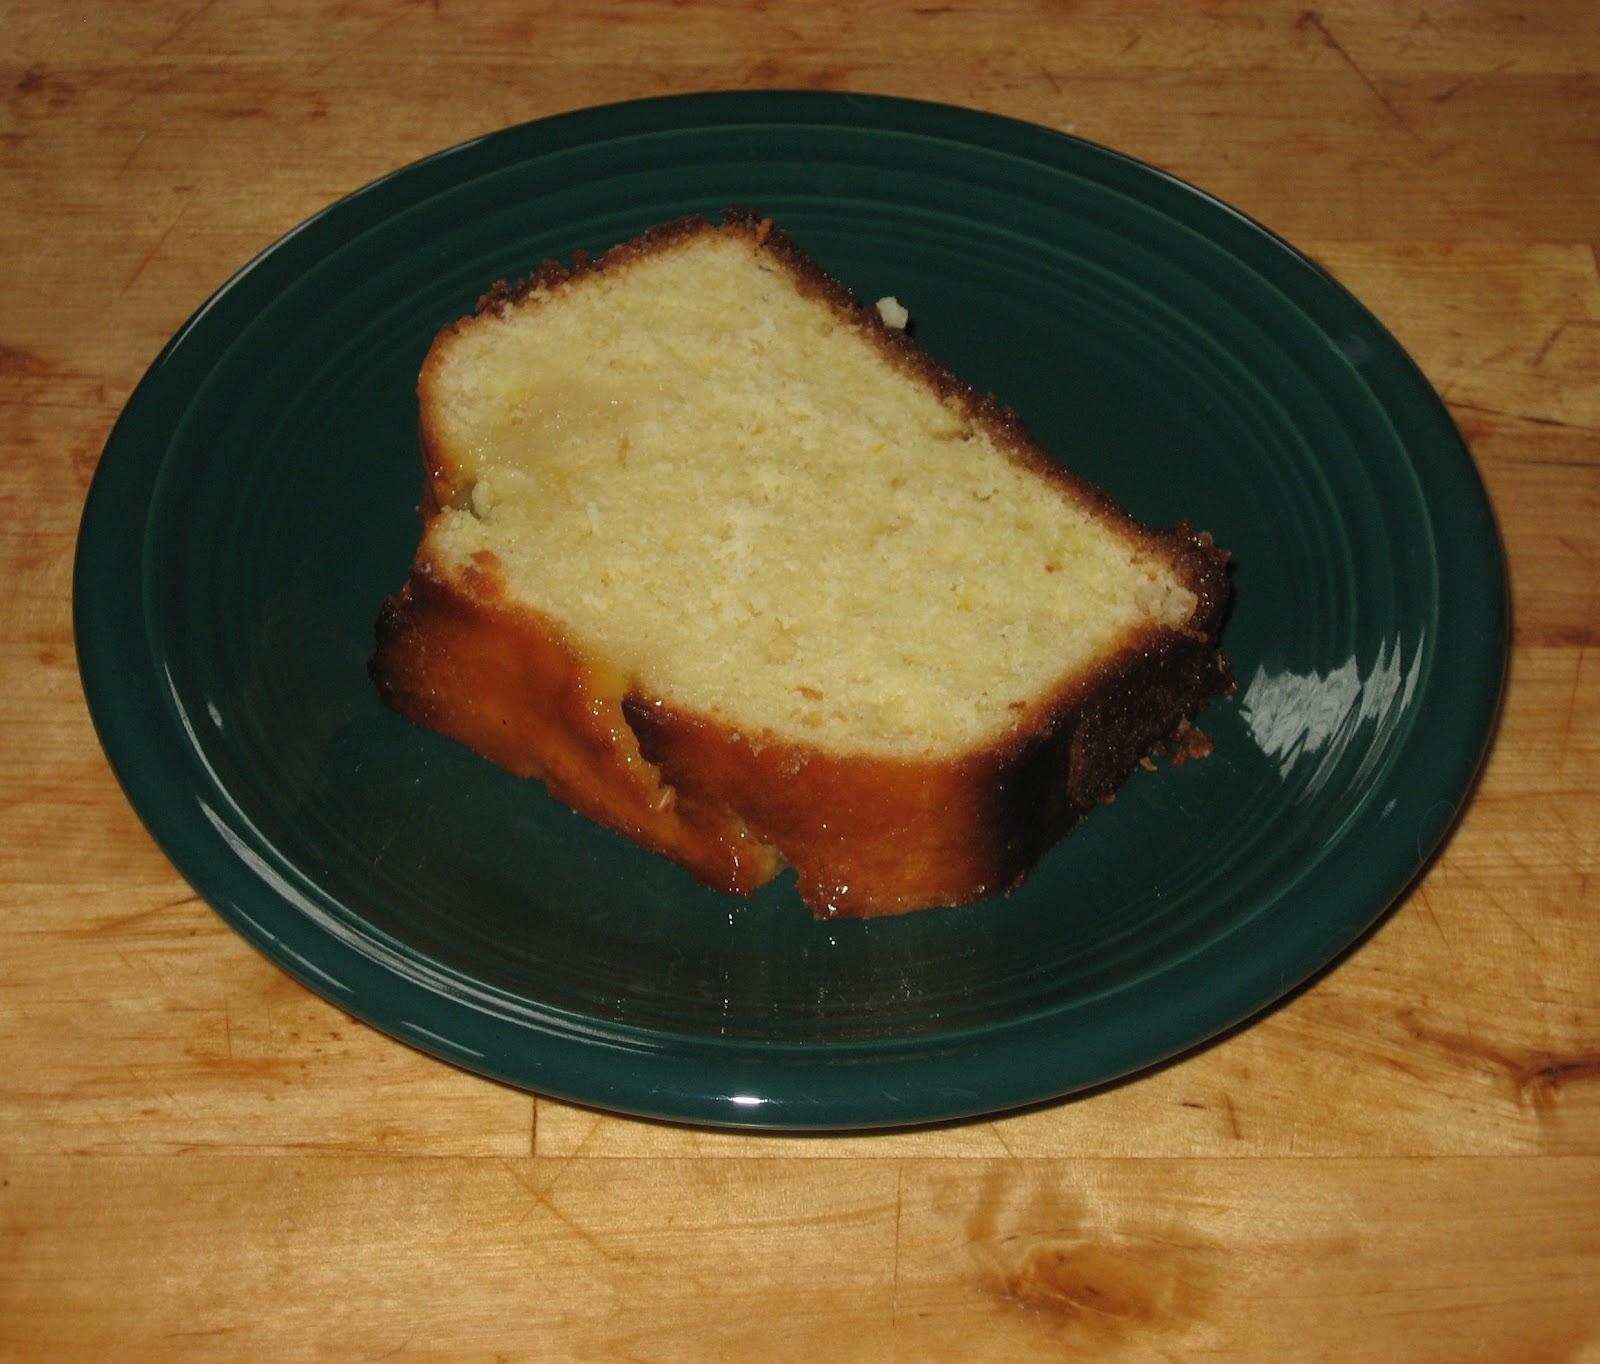
My mother always said I was an Amy and, (unrelated, or so she claims), this past Christmas I received a few limes along with the traditional orange in my stocking. Luckily mine were not tossed out into the snow and so I decided to make a cake! I was suffering for one, you know.
This is a lovely, tender, pound cake flavored with a bit of lime and coconut. While I usually like my citrus desserts to pack a punch, I left the cake itself rather mild and relied on the glaze for the kick. This creates a nice contrast with every bight and a tanginess that just stings the tip of your tongue. Serve with a dollop of lightly sweetened whipped cream or creme fraiche to be fancy, perhaps with some berries or mint for color.
Ingredients:
- 2 c. cake flour
- 2 tsp. baking powder
- 1 tsp. salt
- 1/3 c. unsweetened coconut flakes (Bob's Red Mill is great for this)
- 2/3 + 1/2 c. sugar
- 2 limes
- 2 eggs
- 3/4 c. sour cream
- 1/2 c. olive oil
- 1/2 c. water
- Start by grinding the coconut in a food processor. You want it relatively fine, but not powdered. Don't worry if it's a little chunky.
- Toast the ground coconut in a dry pan for a couple minutes just until it's fragrant and lightly golden.
- Combine the coconut, flour, baking powder, and salt and stir. Set aside.
- In a separate bowl, combine the 2/3 c. sugar and the zest of the two limes. Mix with your fingers and 'massage' the zest into the the sugar until it's fragrant.
- Add the two eggs to the sugar and whisk.
- Add the sour cream and stir, then add the olive oil and stir until it is combined.
- Make a well in the flour mixture and add the wet ingredients in two batches. Stir just until evenly combined. The batter should be thick and slightly lumpy.
- Pour the batter into a greased loaf pan and bake at 350 degrees for 50 minutes, until a toothpick comes out clean.
- While the cake bakes, combine the juice of the two limes, the remaining 1/2 c. sugar, and 1/2 c. water. Bring to a boil and simmer until the liquid reduces to light syrup.
- When the cake comes out of the oven, let it rest for a few minutes. Poke a few small holes over the top of the cake with a toothpick and slowly pour about 2/3 of the syrup over the cake while it's in the pan.
- Let the cake rest about 10 minutes, then gently remove it from the pan. Brush more syrup over the surface of the cake to make sure it is evenly covered.
Enjoy!
Thursday, September 29, 2011
Roasted Red Pepper Sauce
As an easy alternative to tomato sauce, roasted red pepper sauce increases the elegance of any pasta dish. I especially like it on ravioli where it can play off of the flavors of the filling: here I used it atop artichoke ravioli. It would also be sublime on a pizza or in lasagna.
This sauce comes together in a snap and is easily adjusted to make any quantity.
Ingredients:
- Red bell pepper
- olive oil
- garlic
- salt
- oregano
- red pepper flakes (optional)
Directions:
- Rub the outside of the red pepper with olive oil and put it in a pan under the broiler.
- Cook the red pepper until the outside is charred, rotating as needed.
- When the pepper comes out of the oven, cover it with a bowl or towel.
- Once the pepper is cool enough to handle, the skin should easily rub away.
- Remove the top and pulp inside and put the rest of the pepper in a blender or food processor.
- Puree until smooth.
- In a small pan, combine a healthy drizzle of olive oil (about 1 tbsp per average sized pepper), some minced garlic, a sprinkle of salt, some dried or fresh oregano, and the red pepper flakes, (these provide a little heat as the roasted red bell pepper is actually quite sweet).
- Heat the oil over medium until fragrant, then stir in the red pepper puree.
- Reduce heat to low and simmer for 5 minutes to let the flavors combine.
- Adjust seasoning as needed. A little pasta water can be added to thin the sauce if desired.
For a little extra decadence you could add a dash of cream and/or parmesan cheese to the sauce, though it is certainly delicious as is.
Enjoy!
Labels:
Sauces,
Vegan,
Vegetables,
Vegetarian
Tuesday, September 27, 2011
Celebrate Celery with Sensational Seasonal Soup
Celery. You know. That green stuff that's usually left on the crudite platter, alone and limp. That ingredient you usually skip in complicated recipes because you don't have it and who wants to buy a whole bunch of celery for a stalk or two and who's going to notice anyway?
Well, I have news for you: celery is actually really delicious.
But! There are two rules for maximum celery deliciousness:
1. Buy quality celery that still has its leaves.
2. Cook it!
When you're making a dish that really features the celery, I recommend seeking it out at a farmers' market, (contrastingly, if you're looking for a vehicle for ants on a log then giant, watery, crispy supermarket celery is the way to go). Farmers' market (organic) celery will usually look a little different: the stalks will likely be much thinner, it will probably be darker green, and it will have a full crown of lovely leaves. This is a wonderful thing. While I find the stalks themselves to be more flavorful, the leaves of the celery are actually the most flavorful part and should be used for cooking. If you buy from a supermarket, they often cut the leaves off entirely or leave just a few. Ask your produce manager to sell celery with leaves!
Okay, so you have quality celery. It will be tasty on its own, but cooking celery really brings out the delicate flavors. Regardless, these are not in your face flavors. A little grassy and floral with just a hint of onion, it is subtlety embodied. But make the time and effort to appreciate this flavor and you will find it most pleasing. This soup is very pleasing, indeed.
Ingredients:
- 4 tbsp unsalted butter
- 1 tsp salt
- freshly ground black pepper
- a pinch of paprika
- 1 1/2 c. diced yellow onion
- 3 c. diced celery stalks
- 2 c. roughly chopped celery leaves
- 3 c. water
- zest and juice of 1/4 lemon
Directions:
- Melt the butter in a large-ish pot and add the onions, celery, salt, a few grinds of pepper, and paprika.
- Cook over medium heat until the onions are transparent, about 15 minutes. Stir as needed.
- Add the 2 c. celery leaves for the last five minutes.
- Add the the water, zest, and lemon juice.
- Cover and simmer over low heat for at least 30 minutes, (I let it go for an hour).
- Carefully pour the soup into a blender and blend on high until the soup is smooth.
- Taste and adjust for seasoning. I added just a little smoked sea salt.
- Serve plain or with a dollop of greek yogurt and paprika or celery salt for garnish.
If you have leftover celery leaves, dry them for future use! Lay them out on a baking sheet and put in a 250 degree oven for about 5 minutes, until they are dry enough to crumble. You can make celery salt, a lovely garnish, or keep them plain to add a little celery flavor to future dishes.
If you absolutely can't find celery with (enough) leaves, you can still try the recipe but I would add some celery seed, increase the amount of celery stalks, and try to reduce the soup a bit to intensify the flavor.
Enjoy!
Labels:
Cold Weather,
Gluten Free (in theory),
Soup,
Vegetables,
Vegetarian
Sunday, September 25, 2011
Habanero Peach Hot Sauce
I grew some habanero peppers this year, an impulsive nursery purchase for which I had no plan. So they grew and grew and I began to accumulate them as I harvested, not knowing what to do. After one mouth-burning salsa that determined that I wouldn't be eating them raw, I decided to try my hand at cooking hot sauce. It turned out quite well: insanely spicy, but not without flavor. Now I just have to figure out what I'll use the hot sauce for...
Ingredients:
- 6 habanero peppers (I used them when they were orange-- hotter-- but you could use green ones, too)
- 1 peach
- 3 tbsp apple cider vinegar
- 1 tsp salt
- 1/4 c. water
- 1 tbsp olive oil
- Skin and dice the peach, chop up the pepper (wearing gloves!!!), and combine in a food processor, blending until smooth.
- Combine the puree with all other ingredients in a small sauce pan.
- Bring the mixture to a gentle boil, then reduce the heat to low and simmer, covered, for 30 minutes.
- Allow to cool and then refrigerate.
That's all! Enjoy!
Labels:
Garden,
Sauces,
Vegetables
Friday, September 23, 2011
Beet & Goat Cheese Tart
Beets and goat cheese are a classic combination: go to any semi-chic luncheon spot and you will see a beet and goat cheese salad on the menu. Earthy and sweet, creamy and tart: they're a perfect pair. Throw a little balsamic vinegar in there, maybe some walnuts, and you've got yourself one delicious and satisfying lunch.
But what if you're not in the mood for a messy, banal chopped up salad? What if you want something a tad more refined, a little prettier, a little... fancy? Well, if that's you-- and even if it's not-- I have a tart that might just knock your socks off.
This tart is very simple: a whole wheat crust, a goat cheese filling, roasted beets, and a balsamic glaze. A little thyme throughout emphasizes the earthiness and helps bring it into fall.
- 6 tbsp unsalted butter
- 1 tbsp olive oil
- 3 tbsp water
- 1/4 tsp salt
- 1/2 tsp dried thyme or Italian herb blend
- 1/2 c. all purpose flour
- 1/2 c. whole wheat flour
- Cut up the butter and combine in a large glass bowl with the olive oil, water, salt, and herbs.
- Put the bowl in an oven preheated to 400 degrees and bake for 15 minutes.
- Carefully take the bowl out and add the flours all at once, stirring with a wooden spoon until combined.
- Let the dough cool until it is safe to handle.
- Place the dough in your tart pan and push it out with your fingers, making sure to press it firmly into the sides.
- Bake the tart shell at 400 degrees for 10-15 minutes, until it is just firm but still pale. Set aside to cool.
Filling:
- 1/4 c. minced onion or shallot
- 1/4 tsp salt
- 1/2 tsp fresh thyme leaves
- dash of freshly ground black pepper
- 2 eggs
- 5 oz. fresh goat cheese, softened
- 2-ish roasted beets
- Add the onion to a food processor, (a mini/prep version will do), and pulse a few times until it is finely minced.
- Add the remaining ingredients, except the beets, and blend until the mixture is even.
- Pour the goat cheese blend into your cooled tart shell.
- Peel and slice your beets into 1/4" slices. You could certainly slice your beets thinner for a more elegant look, but be sure not to fan them out too much or they may dry out during baking.
- Delicately arrange the beet slices on top of the goat cheese mixture, taking care to 'float' them rather than push them in. I recommend laying your slices out on a plate first so you know just how you want them: once you put them on the goat cheese you won't want to move them.
- Bake the tart at 400 degrees for about 30 minutes, until the goat cheese is set.
Glaze:
- 3 tbsp balsamic vinegar
- 1 tbsp honey
- dash of pepper
- 1/4 tsp. fresh thyme leaves
- Combine all ingredients in a small sauce pan and simmer until it is reduced by half, the honey bubbles, and the mixture becomes syrupy.
- Brush over the top of the tart as soon as it comes out of the oven, (you won't use it all).
- Allow the tart to cool before serving.
With the multiple steps, this tart can be a little time consuming but there's nothing actually difficult about it. Even better, the crust can be made and par-baked and the beets can be roasted days ahead of time, leaving only a little whirring of the food processor and some arranging to do before tossing it in the oven.
Serve this savory tart with a simple green salad, a delicate vegetable soup, or some lightly sauteed greens. Refrigerate it if it won't be consumed the day it's made.
And guess what? If you swap the herbs in the crust for a bit of sugar, leave the onions out of the filling, and put a bit more honey in the glaze... you have dessert!
Enjoy!
Labels:
Cheese,
Savory Tarts,
Vegetables,
Vegetarian
Thursday, September 22, 2011
Quick tip: Freezing Tomatoes
This year I didn't have quite enough spare tomatoes to bother with canning them, so I froze some instead. While you can freeze them whole, (a great way to get the skins off), I chopped mine up so I could freeze them flat for easy storage. To make things even easier, try dividing the tomatoes within the bag: after filling the bag and laying it flat in a pan, gently separate the chopped tomatoes into more manageable portions. Freeze it in the pan until solid, (to keep them flat). These 1/2 c. squares are easily broken apart so I can take out what I need without defrosted the entire bag, reducing possible waste. Now they are ready to add to soups, sauces, and casseroles!
Labels:
Quick Tip
Wednesday, September 21, 2011
Simple Corn Soup
Do you buy your corn from the farmers' market? If not, you should. The difference in flavor and texture is amazing when the corn is picked fresh rather than shipped for days and lingering in a pile at the supermarket.
I get my corn from Stillman's Farms. Since they pick it *the very same morning* as the farmers market, it is amazingly tender, juicy, and sweet, despite the fact that they don't grow the super-sweet varieties usually seen at the grocery store.
When it's this good, I often eat it raw straight off the cob. Or I put it in everyone's favorite corn and black bean salad. But, with summer at its end, I realized I had yet to make corn soup! Not only had I promised myself I would this summer, but it's also a great way to preserve that corny freshness well into winter.
Okay, ready for the recipe?
- 8 ears of corn (about five cups of kernels cut from the cobs)
- 5 c. water
- 1 1/2 tsp salt
- a dash of black pepper
- Put everything in a big pot, (even the shorn cobs!), and simmer for at least 30 minutes.
- Carefully pour it into a blender and... blend it... until soupy.
Voila! Seriously, this is a no-fuss dish.
However! This is really only the beginning. While you can certainly enjoy it like this, I like to enhance the flavor a bit. In the photo at the top, I simmered the corn with a few tablespoons of minced chives and stirred in just a touch of butter at the end. I topped it with a drizzle of basil pesto to serve.
In another batch that I made for freezing, I roasted a red pepper and added that to the blender, (be careful not to add to much or it can overpower the corn). I froze individual portions that I will be able to easily thaw and even add to the flavor a bit more. I'm thinking some roughly chopped cilantro and a dollop of greek yogurt one night. Maybe some sauteed leeks or onions and another trip to the blender another night?
If you want to make a particularly elegant soup, you may want to strain it. I didn't. After I made it the first time I gave it a try and wasn't bothered at all by the little bits of 'corn kernel skin', as they were very tender , (another bonus of local corn: it hasn't been bred to be tough to hold up during travel), and finely blended. But there are certainly times when you might not want that, so strain away!
Enjoy!
Labels:
Gluten Free (in theory),
Quick and Simple,
Vegan,
Vegetables,
Vegetarian
Tuesday, September 6, 2011
Fresh and Simple Pasta Sauce
While there are many people who slave away in the kitchen for hours over a hot stove to perfect their Italian grandmother's tomato sauce, and while it may very well be quite delicious, I prefer a more casual approach to my summertime pasta. This one comes together in about 20 minutes, (depending on your speediness with a knife). It's a light, chunky sauce that lets you know exactly which vegetables you're eating.
Ingredients (for two servings):
- 3 tbsp olive oil
- 2 cloves garlic, minced
- 1/4 tsp. red pepper flakes
- 1/2 tsp salt
- 2 sprigs fresh oregano (or 1/4 tsp. dried)
- 3/4 c. onion, minced
- 3/4 c. yellow bell pepper, diced
- 1 1/2 c. tomato, diced
- 1/4 tsp. brown sugar
- handful of basil leaves, roughly chopped.
Directions:
- Add the olive oil to a large skillet and heat over medium high.
- Add the garlic, red pepper flakes, salt, and oregano and saute for about a minute.
- Add the onion and saute until just translucent, about 3 minutes.
- Add the bell pepper, tomato, and brown sugar.
- Continue to cook, stirring occasionally and lightly mashing the tomatoes with a wooden spoon for about 8 minutes until all of the vegetables are tender.
- If you would like a slightly thicker sauce, add about 1 tbsp tomato paste.
- Taste for seasoning, adjusting salt and brown sugar, (sparingly), as needed.
- Just before serving, add the fresh basil and toss another minute.
- Add your pasta to the pan and toss to coat.
I used whole wheat spaghetti as I really like the slightly nutty taste with the freshness of the vegetables. Optionally top you pasta with some good parmesan cheese for serving. As a side I prepared some fresh romano green beans by boiling them in the pasta water for about 2-3 minutes, then tossing them with good quality extra virgin olive oil, salt, and black pepper.
Enjoy!
Labels:
Beans,
Noodles,
Pasta,
Quick and Simple,
Sauces,
Vegan,
Vegetables,
Vegetarian
Sunday, September 4, 2011
Let's Get Pickled!
I have had quite the bounty of cucumbers this year. Perhaps I was a little overzealous in my planting after last year's early August cucumber death, but at least I've had plenty to work with for experimenting. Refrigerator pickles are quick, easy, and pretty hard to mess up. You can play around with the ingredients and proportions and the worst that will happen is an underwhelming pickle. I've had more success than failure and have enjoyed every bite either way. Here, from left to right, are Spicy Mustard, Cornichons, Dill, Habanero, and Basil pickles.
I grew an heirloom variety of cucumbers called Parisian Pickling. These are great as they can be picked at any size, most notably when they are quite small to be made into Cornichons, those delicious little cocktail pickles. However, I found that these cucumbers were also sublime when left to grow to full size. They were crisp, light, mildly sweet, with tender skin and seeds. And obviously plentiful. Their only drawback was the burps. I seemed to have two variations of burps, (perhaps some seed contamination?): fewer, larger burps that were easily pushed off with a thumb or cucumbers that were absolutely covered in tiny little spines that needed rubbing off with a cloth, (those in the upper right in the photo). Either way, they were worth the additional effort and I plan on growing them again next year.
On to the recipes! All of these recipes can be made with any shape of pickles. The main variable is how long it will take the flavor to saturate the cucumber: round slices are the fastest, followed by spears, and whole pickles will take significantly longer. Simmering the liquid (and dissolving any salt) will make the cucumbers pickle faster but putting everything in cold will result in slightly crisper, greener pickles. All recipes can be increased or decreased for the desired size of jar. Make sure the liquid covers the cucumbers: if you're a little short, go ahead and add a little water to the jar.
Spicy Mustard Pickles (for 1 pint):
- 3 tbsp whole grain mustard
- 2 tsp kosher or sea salt
- 2 tsp red pepper flakes
- 1/4 tsp fennel seed, crushed
- 1 c. water
- 1/2 c. white vinegar
- 1 tbsp apple cider vinegar
- Add all ingredients to a small sauce pan and simmer just until the salt is dissolved.
- Pack your jar with clean pickled (I used sliced).
- Pour the hot mixture into the jar.
- Replace the lid and allow to come to room temperature.
- Refrigerate for 3-10 days.
Dill Pickles (for 1 quart):
- 1 tbsp apple cider vinegar
- 1 tbsp salt
- 1/2 tsp fennel seeds, crushed
- 1/2 tsp red pepper flakes
- 1 tsp black pepper corns
- 1 tsp dill seed (optional)
- 2 garlic cloves, sliced
- 1 1/2 c. water
- 1 1/2 c. white vinegar
- a whole bunch of fresh dill
- Combine all ingredients except for the fresh dill into a small sauce pan and simmer until the salt is dissolved.
- Pack the bottom of the jar with a large handful of fresh dill.
- Pack the cucumbers (I used spears) into the jar.
- Top the cucumbers with even more(!) fresh dill. You can't have enough dill.
- Pour the hot mixture (or allow it to cool to luke warm) into the jar.
- Cover the jar and allow it to come to room temperature before refrigerating for 3-10 days.
Basil Pickles (for 1 pint):
- about 1 dozen large basil leaves
- 1 clove garlic, sliced
- 1 tbsp kosher or sea salt
- 1/2 tsp freshly ground black pepper
- 1/2 tsp red pepper flakes
- 1 tbsp apple cider vinegar
- water
- Put all ingredients except the water into the bottom of the jar.
- Add cucumbers (sliced highly recommended).
- Fill the rest of the jar with cold water.
- Put the lid on and shake the jar.
- Refrigerated for 5 days. While they will last longer, I found the flavor of these to be at their peak between 5 and 25 days.
Cornichons (for 1 pint):
- 1 tsp fennel seed, crushed
- 1 tsp black peppercorns
- 1/2 tsp red pepper flakes
- 1 clove garlic, sliced
- 2 tsp kosher or sea salt
- 1/2 c. white vinegar
- 1 c. water
- Add all ingredients to a small sauce pan and simmer just until the salt is dissolved.
- Pack your jar with small cucumbers.
- Pour the hot mixture into the jar.
- Replace the lid and allow to come to room temperature.
- Refrigerate for 7 days.
Habanero Pickles (for 1 quart):
- 1 habanero (don't even think about putting in another)
- 1 tbsp salt
- 1 tsp ground black pepper
- 1 clove garlic, sliced
- 2 tbsp apple cider vinegar
- 1 c. white vinegar
- 2 c. water
- Pack your jar with cucumbers, (I recommend sliced as they are quite spicy).
- Combine all ingredients and pour them on top of the cucumbers.
- Replace the lid and refrigerate for 3 days.
All pickles should last in the refrigerator for at least 2 months, though I doubt you'll be able to keep them around that long. Feel free to play with different herbs and spices and adjust the saltiness to your own preference. Pickling cucumbers can be found at most farmers markets and regular cucumbers can also be used.
Enjoy!
P.S. It's my 100th post! Yay!
Labels:
Garden,
Snacks,
Vegan,
Vegetables,
Vegetarian
Sunday, August 21, 2011
Zucchini Bread Pudding
Are you in a zucchini rut? Is your fridge stuffed with them and you're sick of just roasting them? Have you eaten as many marinated zucchini salads as you can stomach? This zucchini bread pudding, or stuffing, is a great way to use up a lot of zucchini. While I love roasted zucchini on it's own and can eat it nearly endlessly all summer long, this is a delicious alternative to break up the monotony. Since it's warm and bready, you may want to leave it for a cooler summer day, though I think it would be great chilled, too. Serve it for brunch with fresh fruit or lunch and dinner with a (non-zucchini) salad.
Ingredients:
- 1 loaf whole grain bread, about 7 c. cubed. Look for something that is about half whole wheat and half white or sourdough; make sure it's not too heavy or dense. Ideally leave the cubes out overnight to get a little stale or toast them in the oven a bit to dry them out, but you can use fresh bread with fine results.
- 2 1/2 c. coarsely grated zucchini, about 2 medium. (More zucchini could be used, but you would need to squeeze the excess moisture out.)
- 1 1/4 c. diced onion, about 1 medium
- 2 tbsp. minced sun dried tomatoes
- 2 eggs (if you like eggs, you could use 3 or even 4 for an eggier, richer filling)
- 1 c. buttermilk
- 2 tbsp. extra virgin olive oil
- 2 tbsp chopped fresh basil
- 1 tsp salt
- 1/4 tsp paprika
- 1/2 tsp black pepper
- 1/2 tsp cayenne pepper
- 1/4 c. finely grated parmesan cheese
Directions:
- In a large bowl combine the bread cubes, zucchini, onion, and dried tomato and toss to distribute evenly.
- Whisk together the eggs, buttermilk, olive oil, basil, salt, and spices.
- Pour the liquid over the bread mix and toss to distribute.
- Press the bread down into the liquid. Cover and let soak for 1 hour.
- Butter the inside of a cast iron skillet.
- Pour the bread mix into the skillet and press down firmly.
- Spread the parmesan evenly over the surface.
- Bake in a 400 degree oven for 40 minutes. Optionally broil for a few minutes towards the end if the top needs help browning.
While any casserole dish can be used, the cast iron really helps create a delicious, crispy, caramelized crust. You could also use muffin tins, (or cast iron muffin molds!), to make individual portions that would make a lovely presentation turned upside down. Just be sure to reduce the baking time so they don't dry out.
Enjoy!

Labels:
Bread,
Vegetables,
Vegetarian
Friday, August 19, 2011
Marinated Eggplants
So, maybe you're getting a little tired of baking with eggplant and heating up your kitchen: it is August, after all. Well, do I have the recipe for you! This marinated eggplant is one of my favorite summer meals. Okay, you do have to the stove top for a little bit, but you can make a batch to last a week and it's definitely worth a little sweat. I found this in Recipes from an Italian Summer, a wonderful cookbook for working with summer produce.
Ingredients:
- About 1 1/2 lb. eggplant, any variety large enough to slice
- 3/4 c. flavorful olive oil
- 1 tsp red pepper flakes
- 3 cloves garlic, minced
- 1 tablespoon capers, rinsed, and roughly chopped
- 10 mint leaves, chopped
- a generous sprinkle of salt and pepper
Directions:
- If the eggplant is thick-skinned, peel it. Slice the eggplant into 1/4" rounds.
- Sprinkle the slices with salt and let them drain over a colander for 30 minutes.
- Rinse the eggplant slices and pat them dry. Brush them lightly with olive oil: it's important to use a brush and a light hand here, (don't drizzle!), or they will just soak up the oil in some spots.
- Heat a heavy skillet over high heat.
- Add the eggplant slices in a single layer, cooking them in batches. Turn them once to lightly brown them on both sides. They should lose a lot of their moisture and appear a bit shriveled.
- Whisk the remaining oil, (most of it), with the remaining ingredients.
- Create a layer of eggplant and add a few spoonfuls of the dressing, being sure to get some of the chunky bits.
- Repeat, stacking layers, until all of the eggplant and dressing is used.
- Cover and chill for at least 6 hours before use.
This eggplant is delicious served with some mozzarella or as part of a caprese salad. It is sublime, if a tad oily, sandwiched between sourdough with some mozzarella and pressed into a panini. I think it would be a great accompaniment to a tender chimichurri-marinated steak. If, for some reason, you have extra marinade it makes great salad dressing, too.
Enjoy!
Labels:
Salads,
Side Dishes,
Vegan,
Vegetables,
Vegetarian
Wednesday, August 17, 2011
Deviled Eggplants
Have you ever wondered why we call them eggplants when they don't really look like eggs? We may be more familiar with the dark purple aubergines that tend to grace grocery store shelves, but there are indeed some that are truer to their namesake. These 'Ghostbuster' eggplants from my garden are a great example, with some shorter varieties appearing even more egg-like.
I may hate eggs, but I sure do love eggplant. When all of the other summer produce is crying out to be eaten fresh, eggplant is full of opportunities to bake, saute, grill, and broil to your heart's content.
These 'deviled eggplants' are simply delicious. Though baked and filled with rich lamb meat, the flavor profile keeps them summery. Be sure to pick smaller eggplants with tender skin: go for the pale purple, marbled, or white eggplants instead of the deep purple. With their thinner skin and lack of bitterness, they didn't require any special treatment. If shopping in a grocery store where only dark purple are available, look for the smallest, youngest eggplants.
Ingredients (Serves 2-4, depending on sides):
- 2 eggplants (about 6-8" long)
- 1/3 c. died sweet onion
- 1/4 lb. ground lamb
- 1/4 c. chopped parsley
- 1 egg
- 1/2 c. greek yogurt (nonfat)
- dashes of salt, black pepper, and cumin to taste (1/4 tsp each, to start)
- panko bread crumbs
- olive oil
Directions:
- Slice the eggplants in half lengthwise and scoop out the interior, leaving about 1/4" around the edge.
- Dice the scooped out eggplant and set aside.
- In a large skillet, add a scant drizzle of olive oil and the onions.
- Sautee until the onions for about 3 minutes, then add the lamb and seasonings.
- Stir to break up the lamb and brown it, then add the eggplant.
- Sautee the mixture for about 5 minutes, then add a few tablespoons water to deglaze the bottom.
- Continue to cook until the eggplant is tender.
- In a separate bowl, whisk the egg together with the yogurt and parsley.
- Stir the yogurt mixture into the meat mixture until evenly combined and cook just another two minutes.
- Sprinkle the inside of the eggplant shells with a dash of salt then spoon the mixture into them, mounding it a bit on top to use it all.
- Sprinkle the top of the eggplants evenly with the panko and add a very light drizzle of olive oil.
- Bake the eggplants in the oven for 30 minutes at 350.
- Serve immediately.
I served this with a light simple salad of tomato, cucumber, and onion flavored with fresh parsley, dill, olive oil, salt, and pepper. Easily multiplied to serve a crowd, these can be prepared earlier in the day for easy hosting. Simply make the filling, stuff the eggplants, cover, and refrigerate. Add the panko and put them un the oven, allowing a little extra time since they are now chilled.
Enjoy!
Labels:
Garden,
Lamb,
Meat,
Vegetables
Monday, August 15, 2011
Cucumber Yogurt Salad (or Dip!)
I never thought I could have too many cucumbers, but with my vines doing so well this year I'm finding it hard to keep up with the cucumber (or two) a day that need picking and eating. This simple little salad is a classic and fresh way to use them up. I quite like it for breakfast, as my sweet tooth is not always an early riser. To make it into a dip simply mince the cucumbers or send them through a food processor.
Ingredients:
- 2 cups chopped cucumber (half quarted, half chopped more finely)
- 1/2 c. minced red onion
- 1/2 c. chopped dill
- 3/4 c. greek yogurt (I used 0%)
- 1/4-1/2 tsp salt, to taste
- 1/4 tsp. paprika (optional)
Directions:
- Umm... combine everything and stir.
If you like a thicker texture, don't let the cucumbers sit in the yogurt for more than 2-3 hours prior to serving. For dip, I recommend squeezing out some of the excess water from the cucumbers. It will taste good, regardless, but I found it to get a little soupy after a day in the fridge.
Enjoy!
Labels:
Salads,
Sauces,
Side Dishes,
Vegetables,
Vegetarian
Saturday, August 13, 2011
Stuffed Pattypan Squash
Pattypan squash are just so cheerful and adorable that I feel compelled to use them in a way that takes full advantage of their shape; it would seem a crime to chop them up beyond recognition. Slicing them in half and stuffing them with a light flavored goat cheese is the perfect way to give them a little boost and maintain their sunshiney state.
Ingredients:
- 3 pattypan squash
- 3 tbsp plain goat cheese
- 1 tbsp chopped parsley
- 1 green onion, chopped
- 3 tbsp panko bread crumbs
- salt and pepper to taste
Instructions:
- Slice each squash in half and scoop out the pulpy interior to form a round hollow. Sometimes one half will have a smaller opening, so widen it a bit to allow for more stuffing.
- In a small bowl mash together the goat cheese, parsley, green onion, and a sprinkle of salt and pepper until it is thoroughly blended.
- Press a spoonful of the goat cheese mix into each hollow of the squash.
- Roll each squash half, face down, in the panko to coat the goat cheese.
- Roast in a 400 degree oven for about 10-15 minutes, (placing them in muffin tins help keep them upright), until the squash is tender.
- Place the squash under the broiler for 2-3 minutes to brown the tops a little extra.
I served mine with some fresh roasted green beans. They can easily be a main course, a side, or an appetizer-- maybe even finger food? Make any amount you'd like, just plan on 1 tbsp of goat cheese per (whole) squash. They'd be delicious with basil or chives instead of the parsley, too. Bacon bits instead of the panko would make them extra decadent.
Enjoy!
Labels:
Cheese,
Vegetables,
Vegetarian
Thursday, August 11, 2011
Black Bean Burgers
Summer is a time for grilling, cookouts, barbecues, picnics, and all manner of meat-centric gatherings. In fact, I recently attended a party where the main event was a rather scientific preparation of the burgers, involving liquid nitrogen and deep frying. Delicious (and potentially dangerous?) as it was, one may wonder about our social fascination with meat: is it always necessary? (I suspect that our wonderful host would say that yes, it is.)
I'm certainly no vegan and probably never will be, but these black bean burgers from the Veganomicon are so good that I'd have no problem passing over the beef, (at least now and then). If you're really craving a rare, juicy burger they might not quite hit the spot, but they might create a craving of their very own. They're very easy to put together so it's no hassle to accommodate vegetarian and vegan friends without resorting to those gross frozen versions. So take a break from the veggie kabobs, grilled portobello caps, and tofu dogs and try this vegan black bean burger instead!
Ingredients:
- 1 can black beans (you can certainly make your own, but canned is really perfect for this recipe)
- 1/2 c. vital wheat gluten (find this at 'health food' type stores: Bob's Red Mill makes some)
- 1/2 c. bread crumbs
- 1/2 tsp. paprika
- 1/2 tsp. cayenne
- 1/2 tsp. cumin
- 1/4 c. water
- 1 tbsp. tomato paste or ketchup
- 2 garlic cloves, minced or pressed
- 1/2 c. onion, minced or grated
Directions:
- Mash the beans with a fork in a mixing bowl so there are no whole beans but they retain some texture.
- Add everything else and mix together to evenly distributed.
- With your hands, knead the mixture a bit to help it come together.
- Divide the mix into six equal parts and press it into patties. They should be 1-1.5" thick, depending on your buns (they won't shrink much).
- Heat a cast iron skillet over medium heat and add a light drizzle of olive oil.
- Cook the patties in two batches for 5 minutes on each side, pressing down firmly but gently with the spatula. Add additional oil between batches if necessary.
We served our black bean burgers on whole wheat buns with tomatoes, red onions, kale, ketchup, and whole grain mustard. I really like using kale instead of lettuce on burgers: it has such a nice bite to it.
To freeze the black bean patties, allow them to cool and wrap tightly with plastic wrap. To reheat, bake in the oven or defrost in the microwave and finish in a skillet.
Enjoy!
Labels:
Barbecue,
Beans,
Vegan,
Vegetarian
Wednesday, August 10, 2011
Blueberry Lemon Buttermilk Cakes
Remember how I said that buttermilk cake was an easy and great base for any number of variations? Well, here's one of them!
To the basic recipe I added 1 tbsp lemon zest. I placed fresh, seasonal blueberries in the bottom of a regular-sized muffin tin and spooned the batter on top. After baking them for about 10 minutes I inverted them onto a plate and voila! A dozen individual cakelettes, perfect for entertaining!
Enjoy!
Saturday, August 6, 2011
Summer Vegetables and Socca
I experimented with growing carrots this year. I selected an heirloom variety called 'Parisian Market', which are small round carrots that grow to about 1-2" in diameter. Overall it was a success and I had quite the bounty of delicious, sweet carrots. I did, however, learn that my soil is a bit rockier than I realized. This led to some rather unusual carrots being pulled from the ground...
Next year I'll try my carrot cultivation in pots to avoid this (and make weeding easier), but until then I'll have a bit of added humor on my plate.
I wanted to keep my preparation simple, so I tossed these carrots and some zucchini with olive oil, cumin, and salt. I roasted them until tender (you may want to start the carrots ahead of the zucchini) and served them alongside fresh spinach sauteed with garlic and some slices of socca flavored with rosemary. Nothing fancy here, but it was a very satisfying meal.
Enjoy!
Labels:
Garden,
Vegan,
Vegetables,
Vegetarian
Friday, August 5, 2011
Oatmeal Pancakes
When I first saw these oatmeal pancakes, I was intrigued. I had recently tasted some oat and cornmeal waffles at a local restaurant and had creative breakfast foods on the brain. I've tinkered around with the recipe a bit and have found many delicious variations. Here are two of them.
Ingredients:
- 3/4 c. flour
- 1/4 c. cornmeal (coarse gives more crunch, but make sure it's not too coarse--ahem Bob's Red Mill-- or it won't cook enough.)
- 2 1/2 tsp. baking powder
- 2 tbsp brown sugar
- 1/4 tsp cardamom (optional)
- 1/2 tsp sea salt
- 1 c. buttermilk
- 1 c. cooked oatmeal (rolled oats, not quick or steel cut)
- 1 egg
Ingredients:
- 1 c. flour
- 2 1/2 tsp. baking powder
- 2 tbsp sugar
- 1/2 tsp cardamom
- 1/2 tsp sea salt
- 1 tbsp. orange zest
- 1 c. milk
- 1 c. cooked oatmeal (rolled oats, not quick or steel cut)
- 1 egg
Instructions:
- Whisk together everything but the (butter)milk, zest, oatmeal, and egg.
- Whisk the (butter)milk, zest, oatmeal, and egg together separately.
- Gently fold the dry into the wet until just combined. This is a slightly thicker batter than usual, but it turns out wonderfully.
- Heat up a cast iron skillet. When hot, add a little butter (just enough to give the pan a light coat).
- Drop in the batter, 1/4 c. for each pancake.
- Cook until you see bubbles rising to the surface then flip once.
- Serve hot with butter, honey, and fresh fruit.
These pancakes are a little heartier than the usual suspects and really keep you feeling full and energized all day. Sure, regular fluffy pancakes are tasty but I really enjoy the well-rounded flavor that these have. I also like to tell myself that they're just a tad healthier.
Enjoy!
Labels:
Breakfast,
Grains,
Vegetarian
Wednesday, August 3, 2011
Pizza with Zucchini and Kale Pesto
I've made this kale pesto a few times since I first thought of it and I've loved it more each time. It's now one of my favorite pizza toppings, imparting a lovely earthy vegetable flavor to every bite. It's also a great way to use up a bunch of kale quickly.
Kale Pesto
- 2 garlic cloves
- ¼ c. quality extra virgin olive oil
- 2 c. packed kale pieces
- 1 tsp salt
- 5 sun dried tomato halves, soaked in warm water for 10 minutes.
Throw everything into a food processor and blend until the desired consistency is reached. You can add a bit more olive oil to thin it out if you want.
To make this pizza, simple push out your pizza dough and spread the kale pesto over it. Top it with thinly sliced zucchini, some red onion, and some slices of fresh mozzarella. Bake in a 475 degree oven 15-20 minutes until the crust is golden and the cheese is bubbly and browned.
Enjoy!
Labels:
Pizza,
Sauces,
Vegetarian
Subscribe to:
Posts (Atom)