Showing posts with label Cake. Show all posts

Wednesday, February 15, 2012

Are limes the fashion now?


I'm dreadfully in debt, and it won't be my turn to have the rag money for a month."

"In debt, Amy? What do you mean?" And Meg looked sober.

"Why, I owe at least a dozen pickled limes, and I can't pay them, you know, till I have money, for Marmee forbade my having anything charged at the shop."

"Tell me all about it. Are limes the fashion now? It used to be pricking bits of rubber to make balls." And Meg tried to keep her countenance, Amy looked so grave and important.

"Why, you see, the girls are always buying them, and unless you want to be thought mean, you must do it too. It's nothing but limes now, for everyone is sucking them in their desks in schooltime, and trading them off for pencils, bead rings, paper dolls, or something else, at recess. If one girl likes another, she gives her a lime. If she's mad with her, she eats one before her face, and doesn't offer even a suck. They treat by turns, and I've had ever so many but haven't returned them, and I ought for they are debts of honor, you know."

"How much will pay them off and restore your credit?" asked Meg, taking out her purse."

"A quarter would more than do it, and leave a few cents over for a treat for you. Don't you like limes?"

"Not much. You may have my share. Here's the money. Make it last as long as you can, for it isn't very plenty, you know."

"Oh, thank you! It must be so nice to have pocket money! I'll have a grand feast, for I haven't tasted a lime this week. I felt delicate about taking any, as I couldn't return them, and I'm actually suffering for one."


Little Women

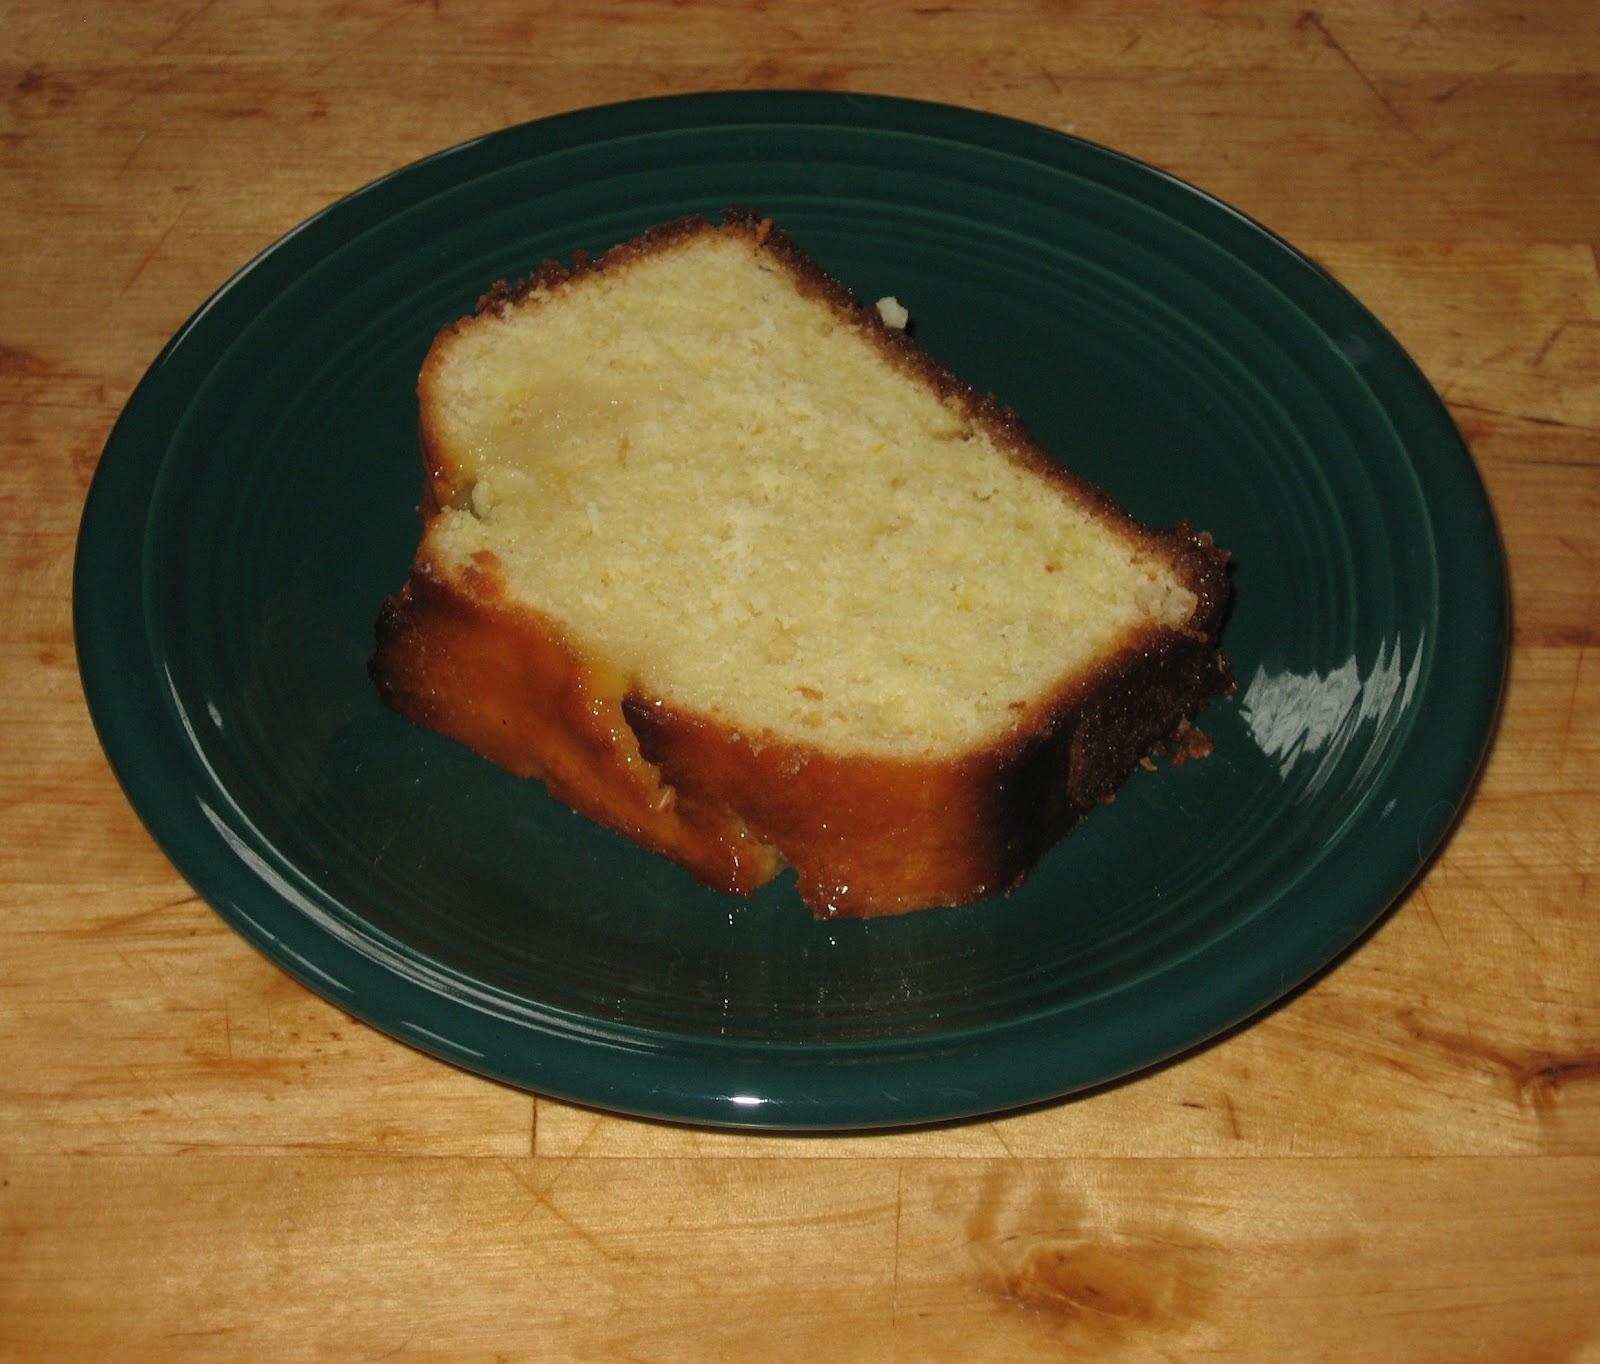
My mother always said I was an Amy and, (unrelated, or so she claims), this past Christmas I received a few limes along with the traditional orange in my stocking.  Luckily mine were not tossed out into the snow and so I decided to make a cake!  I was suffering for one, you know.

This is a lovely, tender, pound cake flavored with a bit of lime and coconut.  While I usually like my citrus desserts to pack a punch, I left the cake itself rather mild and relied on the glaze for the kick.  This creates a nice contrast with every bight and a tanginess that just stings the tip of your tongue.  Serve with a dollop of lightly sweetened whipped cream or creme fraiche to be fancy, perhaps with some berries or mint for color.

Ingredients:
- 2 c. cake flour
- 2 tsp. baking powder
- 1 tsp. salt
- 1/3 c. unsweetened coconut flakes (Bob's Red Mill is great for this)
- 2/3 + 1/2 c. sugar
- 2 limes
- 2 eggs
- 3/4 c. sour cream
- 1/2 c. olive oil
- 1/2 c. water

Directions:
- Start by grinding the coconut in a food processor.  You want it relatively fine, but not powdered.  Don't worry if it's a little chunky.
- Toast the ground coconut in a dry pan for a couple minutes just until it's fragrant and lightly golden.
- Combine the coconut, flour, baking powder, and salt and stir.  Set aside.
- In a separate bowl, combine the 2/3 c. sugar and the zest of the two limes.  Mix with your fingers and 'massage' the zest into the the sugar until it's fragrant.
- Add the two eggs to the sugar and whisk.
- Add the sour cream and stir, then add the olive oil and stir until it is combined.
- Make a well in the flour mixture and add the wet ingredients in two batches.  Stir just until evenly combined.  The batter should be thick and slightly lumpy.
- Pour the batter into a greased loaf pan and bake at 350 degrees for 50 minutes, until a toothpick comes out clean.
- While the cake bakes, combine the juice of the two limes, the remaining 1/2 c. sugar, and 1/2 c. water.  Bring to a boil and simmer until the liquid reduces to light syrup.
- When the cake comes out of the oven, let it rest for a few minutes.  Poke a few small holes over the top of the cake with a toothpick and slowly pour about 2/3 of the syrup over the cake while it's in the pan.
- Let the cake rest about 10 minutes, then gently remove it from the pan.  Brush more syrup over the surface of the cake to make sure it is evenly covered.

Enjoy!

Wednesday, August 10, 2011

Blueberry Lemon Buttermilk Cakes


Remember how I said that buttermilk cake was an easy and great base for any number of variations?  Well, here's one of them!

To the basic recipe I added 1 tbsp lemon zest.  I placed fresh, seasonal blueberries in the bottom of a regular-sized muffin tin and spooned the batter on top.  After baking them for about 10 minutes I inverted them onto a plate and voila!  A dozen individual cakelettes, perfect for entertaining!

Enjoy!

Tuesday, June 28, 2011

Easy, Versatile Buttermilk Cake


Summer tends to be a time for simple desserts.  With all of the glorious fresh fruit available that hardly needs fussing with, the elaborate desserts of winter are easily forgotten.  Besides, who wants to hang around a hot stove or deal with melty doughs?

But, while fresh fruit is delicious on its own, sometimes you want something a little more special.  This basic buttermilk cake goes with everything that summer has to offer.  Fluffy, tender, and softly sweet it is always a crowd-pleaser.  It's quick and easy to throw together and with it's fast cook-time your kitchen will hardly heat up.  What I especially like is that the recipe is great to tinker with.  Add flavor with zests, add fruit to the top, (like the original recipe calls for), or the bottom as an upside-down cake.  Cut it in half and spread some jam in the middle or make a giant strawberry shortcake.  Make a buttermilk or citrus glaze to drizzle over the top.  The possibilities are endless.

Ingredients:
- 1 c. flour
- 1/2 tsp. baking powder
- 1/2 tsp baking soda
- 1/4 tsp. salt
- 4 tbsp unsalted butter, softened
- 3/4 c. sugar
- 1 tbsp lemon zest
- 1 egg
- 1/2 c. buttermilk
- 2 tbsp brown sugar or demerara sugar (for more crunch)


Directions:
- Whisk together flour, baking powder, baking soda, and salt.
- In a separate bowl, combine the sugar and lemon zest.  Mix with your fingers to release the oils of the zest until the sugar is moist, clumpy, and fragrant.
- Add the softened butter to the sugar and beat until fluffy.
- Add the egg and beat until combined.
- Add the flour in three batches and the buttermilk in two batches, alternating between them, gently mixing until it is just combined.
- Pour the batter into a buttered 8" pan.  A tart pan is the perfect size and created a pretty edge, but if you're adding fruit you'll need something deeper.  A 9" cake pan can be used, but the cake ends up a little thinner than I prefer.
- Sprinkle the top of the dough with the brown sugar.
- Bake in a 400 degree oven about 20 minutes.  If fruit has been added, it may take a little longer.

Serve at room temperature with fresh fruit and perhaps some creme fraiche if you're feeling fancy.  Covered tightly with plastic wrap, the cake will last 2-3 days.

Enjoy!

Tuesday, May 24, 2011

Grapefruit Cake


A less expected hit at my tea party, these grapefruit cakelettes were certainly scrumptious.  Lemon pound cake is a classic, and one I do enjoy, but there's something a tad more fanciful and sophisticated about a grapefruit cake.  It's the perfect blend of sweetness with just a hint of tart and a whisper of bitter.  I gleaned the recipe from Thomas Keller's Ad Hoc at Home cookbook, (I've also made Ina Garten's grapefruit yogurt cake in the past, but this one's the winner).  The original recipe calls for a loaf cake, but little cakes are just so much more fun if you have some molds or a muffin tin floating around.  This cake is easy to throw together and baking mini versions makes it all the faster.

Ingredients:  For the 16 mini cakes I made above I used a half recipe, but I'll list for the full recipe below.
- 2 c. flour
- 1 3/4 tsp baking powder
- 1 tsp salt
- Zest of 2 grapefruits (I doubled this from the original and very much liked the resulting flavor
- 2 eggs
- 1 c. + 2/3c. granulated sugar
- 1 c. whole milk
- 3/4 c. canola oil
- 1 tsp. vanilla extract
- 1 c. + 2 tbsp fresh pink grapefruit juice (2-3 depending on size and juiciness)
- 3/4 c. powdered sugar

Directions:
- Combine the flour, baking powder, and salt in a bowl and stir.
- In a large bowl, whisk together 2/3 c. sugar and eggs.
- Whisk in the milk, then the oil, then the vanilla and grapefruit zest.
- Add the dry ingredients to the wet in three batches, stirring just until blended.
- Pour the batter into the oiled vessel of your choice.
- Bake in a 350 degree oven.  Baking time will depend on the size and shape you're going for.  A loaf will take about 1 hour, the mini cakes I made took about twelve minutes (not that they won't brown on top: they're pretty shallow so they are done through before they get a chance to brown.  You could probably stick them under the broiler briefly if you wanted, but I didn't mind their pallor for this presentation).  They are done when a toothpick inserted in the middle comes out clean.
- While those bake, make a simple syrup by combining 1 c. sugar with the 1 c. grapefruit juice.  Simmer just until the sugar dissolves.
- When the cake comes out of the oven, let it rest for 5 minutes.  Now you are going to bathe the cake with the simple syrup.  Poke the cake with a toothpick or skewer all over.  Ladle the simple syrup into the pan slowly, allowing it to absorb (if you're using small, intricate metal molds, you may want to take the cakes out before this step).  Keep ladling until it doesn't want to take any more.  Let the cake cool completely.  (Save any remaining simple syrup in the fridge-- a spoonful is great in a gin and tonic.)
- Mix together the remaining 2 tbsp grapefruit juice and the powdered sugar.
- When the cake is completely cool, take it out of the pan and pour the glaze over it.  It may be easier to just dip small cakes.
- Allow the cake to dry until the glaze is set, then serve at room temperature.

The added steps of the syrup and glaze may seem like an extra nuisance, but I think they're worth it.  While I'm sure the cake is tasty without them, they really enhance the grapefruit flavor.  if you simply must skip one, leave off the glaze and keep the syrup... but really, why would you do that?

Enjoy!

Wednesday, May 18, 2011

Pinkies Up!


I know there was that whole revolution thing 235 years ago and we became a nation of coffee drinkers... but having a tea party is just so much more fun!

Tea parties just don't happen that much anymore and I think it's a shame.  We tend to entertain in the evenings, relaxing at the end of the day before retiring for the night.  Tea parties, and other day time gatherings, are a welcome change and seem delightful and whimsical in comparison.

Generally speaking, there are a few options when it comes to tea parties:

Time:
- Late morning or late afternoon both work for tea parties.  Morning tea parties, around 11 o'clock, tend to be a bit more brunch-like.  Expect to serve a bit more food but stay with the tea concept: no pancakes and bacon or anything that requires a full-sized plate.  Morning tea may last a bit longer as it runs into lunch time, but expect guests to move on with their days.
- Afternoon tea, traditionally high tea at 4 o'clock, allows for a bit more diversity.  Given that, presumably, guests will have eaten lunch and will be eating dinner, they won't arrive expecting to be filled with food.  While you can still go all out, an afternoon tea party is an excellent way to entertain simply on a budget.  Guests know they're not staying for dinner which helps create a defined end for the gathering.


Food:
- You can keep it simple or go all out.  As I mentioned, if hosting a morning tea expect to serve more food but that doesn't mean it has to be fancy.  You also don't have to buy everything from scratch: do, however, buy quality pre-made products.
- While small or bite-sized snacks are traditional, there is nothing wrong with serving slices of a larger tart or cake.  Just make sure that anything you serve can fit on a petite plate and can be easily eaten with a fork or spoon alone, no knives required.  As guests are not sitting at a table, keep in mind that crumbly things, especially when cut, can make a mess on your guests and our sofa.
- There is no set number of dishes you have to prepare, but it's nice to have a variety, especially with a larger number of guests.  If serving several types of small snacks, make sure there are enough of each for each guest to have two.  Try to balance sweet and savory dishes.
- Then there's the tea!  I prefer to keep plain hot water in the tea pots and let guests select their own tea bags for their cup.  While many tea aficionados scoff at tea bags, they really are ideal for their situation.  Tea balls and other contraptions can be messier in a party setting and not all guests may be familiar with them.  Be sure to provide a variety of flavors and include some non-caffeinated and herbal options.  Prepare a tray with accompaniments including warmed milk, sugar, and lemon slices.  Don't forget to provide a bowl for discarded tea bags and wrappers!  On warmer days I also like to provide iced tea as an option.


The tea party I recently threw is definitely an example a fancier gathering that I went all out for.  While it was certainly great fun and I enjoy the challenge of putting together such an event, it certainly doesn't represent the standard.  That said, it was surprisingly easy.  I was able to complete much of the work ahead of time.  All tart crusts were made the day before as well as the fillings, leaving some simple assembly and brief baking to be done before the guests arrived.

The Menu:
- Cucumber sandwiches (a classic for sure)
- Toast bites with cream cheese, smoked salmon, and capers
- Asparagus goat cheese mini tarts
- Strawberry frangipane mini tarts
- Lemon cream mini tarts
- Grapefruit cakes
- Assorted chocolates (store bought)

I will be covering the recipes in detail in the days to come!

The most important part of any gathering, tea party of otherwise, is to make sure you have fun.  Whether you throw an elaborate party for twenty or have two close friends over for tea and cookies, entertaining should be a pleasure!  In other words... enjoy!

Sunday, April 24, 2011

Gateau Basque


The cherry tree outside my house has bloomed.  It's wonderful to step outside on my balcony and be surrounded by their delicate, pastel beauty.  It also reminded me of a dessert I've been meaning to make: Gateau Basque.

Gateau Basque originates from the Basque region along the border of France and Spain.  It's something between a cake and a tart: the dough is slightly flaky, but also tender and crumbly.  Traditionally it is either filled with pastry cream or cherry preserves, which is what triggered the memory.

As I sit writing this on a particularly rainy afternoon, (hoping all the while that the cherry blossoms aren't washed away so soon), I am reminded of another rainy afternoon when I first tasted Gateau Basque in Bayonne, France.


After a day of touring the city, I sat down under an awning outside a cafe not far from where this photo was taken.  The rain gently fell and I ate my slice of gateau basque and savored the quaint moment.  The street was quiet, the sleepy afternoon rain causing most people to retreat inside.  It was peaceful and I remember feeling content.  Recreating Gateau Basque in my own kitchen may not recreate that same exact feeling, but I remembered it with every bite.


I used Dorie Greenspan's recipe and found it to be a wonderful version, very close to how I remember it.  Note that I used a larger pan than she did (9" instead of 8") so my layers are slightly thinner than ideal.  It was certainly still delicious, but next time I will seek out a smaller pan.

Ingredients:
- 10 tbsp butter (1 1/4 stick)
-1/4 c. sugar
- 1/4 c. brown sugar
- 1 egg
- 1/2 tsp. vanilla
- 2 c. flour
- 3/4 tsp. baking powder
- 1/8 tsp. salt
- 3/4-1 c. good quality, thick black cherry jam (or pastry cream)
- 1 egg, beaten for glaze


Directions:
- Make sure your butter is at room temperature.  To speed this up, slice the butter up and spread it out on a plate.
- Combine the butter and sugars and beat on medium speed until blended and smooth.
- Add the egg and vanilla and beat an additional three minutes.
- Combine the flour, baking powder (no lumps!), and salt.
- Add the the dry ingredients to the wet in about three portions, blending on low just until combined.
- Divide the dough into two portions, gently formed into discs.
- Place each disc between sheets of plastic wrap and gently roll each disc out to the size of your pan.  I recommend making the bottom disc just slightly larger (about 1/2") than your pan so it will curl up a little at the sides.  Be sure to flip the disc often and straighten the plastic so it doesn't become embedded in the dough.  Rotating the dough as your roll it and rolling from the center outward will help you keep them evenly round.
- Refrigerate the dough until it firms up a bit, about an hour (unless your kitchen is particularly warm).
- Preheat your oven to 350.
- I recommend using a spring-form pan for easy removal.  This is about the only item for which I like non-stick.  If your pan is not non-stick, butter the inside generously.
- Gently lower the first (larger) disc into the bottom of the pan.
- Spoon your jam evenly onto the dough, leaving a 1" border around the edge.
- Place the second disc on top of the jam and gently press the edge down.  It will seal as it bakes, so no need to be vigorous here.
- Brush the top of the tart with the beaten egg (you won't use it all).  With the tines of a fork or the back of a knife, draw your desired design.  Traditionally cakes filled with cherry show the Basque cross and cakes filled with pastry cream feature a cross-hatch.
- Bake the cake for 40 minutes until evenly golden on top.
- Allow the cake to cool for 10 minutes, then remove it from the pan.


Serve at room temperature.  This cake is delicious on its own and I would discourage the temptation to top it with whipped cream or ice cream: its simplicity is a virtue.  Since the dough is not too sweet, it is suitable for brunch, tea, or dessert.  I found that it lasted well at room temperature for three days well wrapped, though humidity would take its toll.

This is a particularly quick and easy treat to make with very satisfying results.  It will certainly make a return in my kitchen, and I may even use the dough as a base for some other upcoming projects...

Enjoy!

Wednesday, October 7, 2009

Martha's Peach Cornmeal Skillet Cake


The lovely Peach Cornmeal Upside-Down Skillet Cake

Okay, I confess: this recipe is not a Rori original, but instead comes from Martha Stewart. Find the original recipe here. For such a beautiful and delicious cake, it's quite easy to make.

Ingredients:
  • 2 medium peaches (I had giant peaches and used just over one)
  • 1 cup cornmeal
  • 3/4 all-purpose flour
  • 1 tsp baking powder
  • 1 1/4 tsp coarse salt
  • 1 1/2 tsp dried lavender (optional, so no need to tear open the sachets in your underwear drawer if you can't find it)
  • 1 stick + 3 tablespoons butter, unsalted (though I used salted for the 3 tbsp)
  • 1 cup sugar (I used a blend of about 2/3 white and 1/3 brown)
  • 3 eggs
  • 1/2 cup heavy cream (I used light cream because I had it on hand, and it turned out fine, though heavy cream would likely make it a bit more decadent)
  • 1/2 tsp vanilla extract

A close-up of the caramelized crust.
Prepping (measuring, chopping, etc.) all of your ingredients ahead of time is always a good idea. With this recipe it is extra helpful, if not essential.
Directions (in my words):
  • Preheat your oven to 350.
  • Slice your peaches, leaving the skin on. I got about 12 slices out of each peach.
  • Heat 3 tbsp butter in a cast iron skillet on medium heat, brushing some along the sides as it melts.
  • When the butter is fully melted, sprinkle 1/4 cup of the sugar evenly around the pan. It will melt and begin to bubble after about three minutes.
  • Quickly but carefully place you peaches in the pan in a decorative manner. Place them as close as you can to each other, even slightly overlapping as they will reduce as they cook. Avoid moving them once placed.
  • Reduce the heat to low and cook for about 10 minutes. The peaches will soften and their juices will be bubbling with the sugar. Remove the pan from the heat when they are done.
  • In a large bowl combine cornmeal, flour, salt, baking powder, and lavender (crushed and/or roughly chopped).
  • Add one stick of softened (room temperature) butter. Beat at high speed for about three minutes. The mix will look crumbly but fluffy.
  • Beat in eggs one at a time until fully blended at medium speed.
  • Add combined cream and vanilla, half at a time, blending at low speed.
  • Drop large spoonfuls over the peach and suger mix in the skillet. Avoid mixing any of the peach liquid in with the batter, as you want it to remain on top to form a nice glaze.
  • Gently spread the batter evenly in the pan, going all the way up to the edge.
  • Put in the oven to bake. Martha recommended 20-22 minutes but mine required about 30. Start checking it after 20, looking for a golden brown color. A knife or toothpick inserted in the middle should come out clean.
  • After the skillet is removed from the oven, let it stand for about ten minutes.
  • Run a knife or spatula around the edge of the cake to make sure it's loose, then quickly flip your cake onto a plate. Give the bottom of the pan a few firm pats to ensure the peaches have come off, then unveil your creation!
Ready to enjoy the fruits (or cakes) of my labor.

It's great served slightly warm, either on its own or with some creamy vanilla ice cream. The true magic of this cake is that it doesn't have to be with peaches-- you can substitute any fruit you might like or that's in season (apples, plums, pears, etc.) and also play with the herbs and spices. I'm thinking blackberries and rosemary next time?

Enjoy!
- Rori